
I made this slouchy beanie for my daughters and it really touches my heart how fast my design has become such a success, especially on Facebook (in crocheting forums), Pinterest and Instagram! I have received many hopeful wishes for an English translation so I finally caved in! 😉 Länk till mitt svenska mönster.
Important!
You are very welcome to crochet your own beanie from my pattern BUT if you publish photos of your work on the net, regardless of social media, I ask of you to post a link to my blog (preferable to this pattern) and mention that it is a Design by BautaWitch.
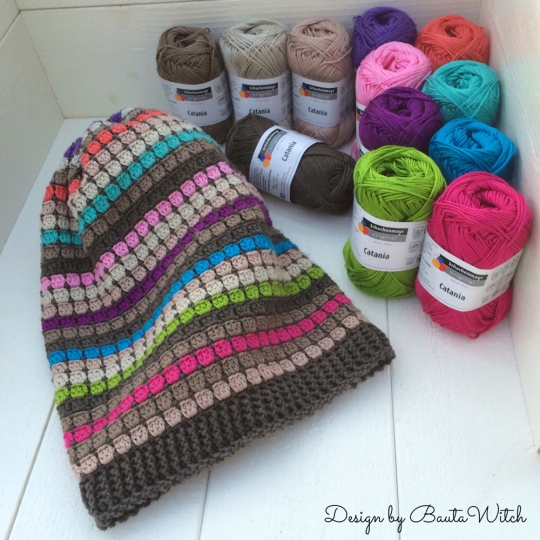
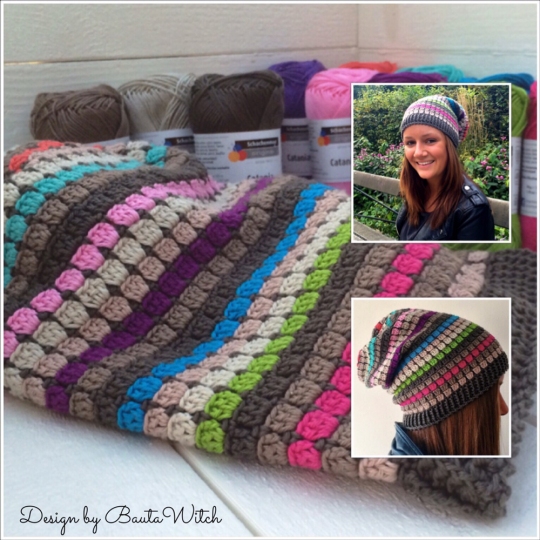
The design is made in, Catania which is my favorite yarn of all times! It is made of 100 % cotton and absolutely do not itch. I sell this beautiful yarn in my web shop but so far I only deliver within Sweden.
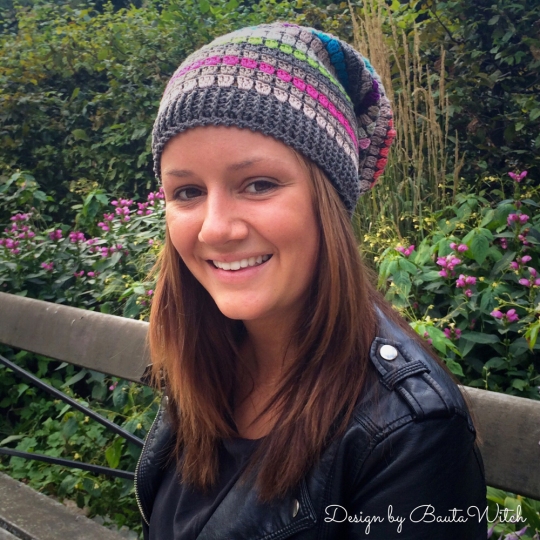
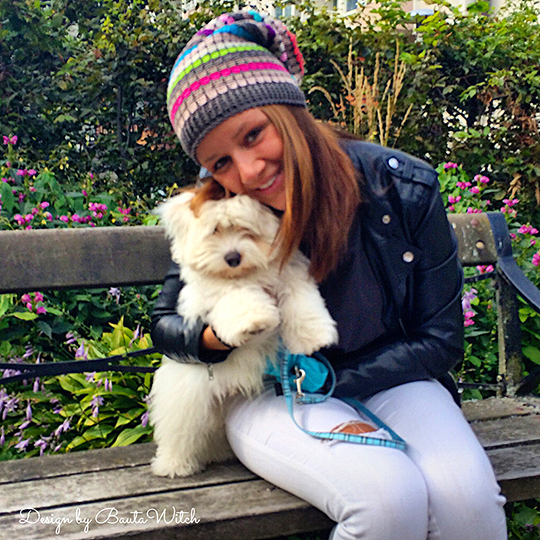
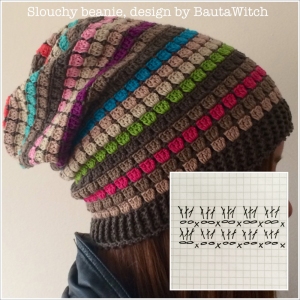
My beanie is modelled by my youngest daughter, the lovely D and our Coton de tulear puppy Woofie. ❤
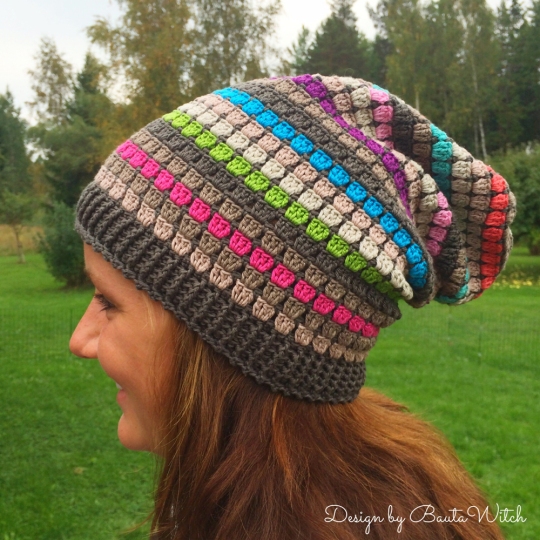
Slouchy Beanie by BautaWitch
YOU WILL NEED:
– approx 6 balls of Catania – crochet hook 2,5, 3 och 3,5 mm.
The stiches are a mixture of clusters and chain spaces which makes the beanie nice and tight but it also ”eats” quite a lot of yarn. Chose one color for your base and pick 2 balls of that color. I have used Dark Olive (387) as my base and all together 12 different colors – a mixture of very bright and happy colors with earth tones.
HOW TO MAKE IT:
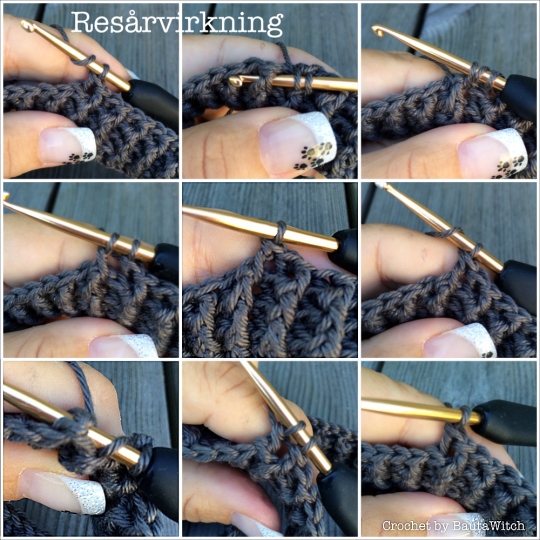
RESÅRKANT = RIB
If you have not crochet rib before, I strongly recommend you to view a very good instruction video made by Drops!
To the Drops video!
Chain as many stiches as you need with hook 3 mm, for the beanie to fit quite tight around your head. You should be able to divide the number with both 2 and 3. For my beanie, I chained 120.
Crochet rib:
Ch 120, finish with 1 sl st in 1st ch.
Round 1: Ch 2 = 1st dc, *work 1 dc in every chain* = 120 dc. Finish round with 1 sl st in 1st dc on round.
Round 2-5: Ch 2, *1 dc in the next dc from the front, 1 dc in the next dc from the back* Repeat between the *s. Finish round with 1 sl st in 1st dc on round. You will continue with the same color after making the lacy edging of the rib so do not cut your yarn.
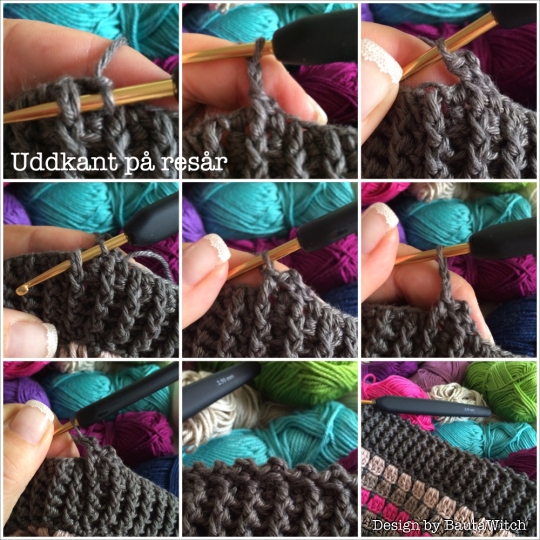
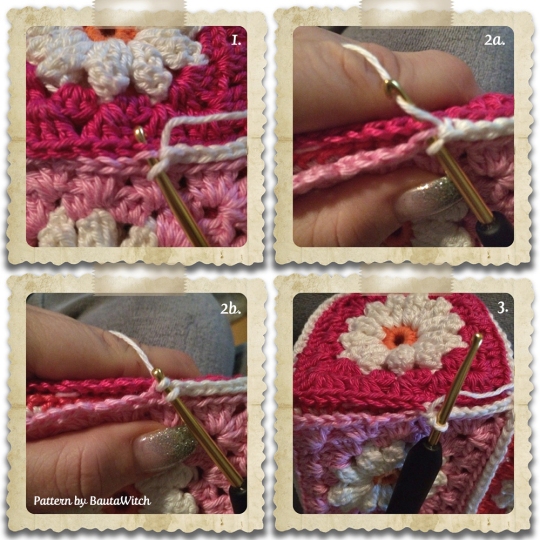
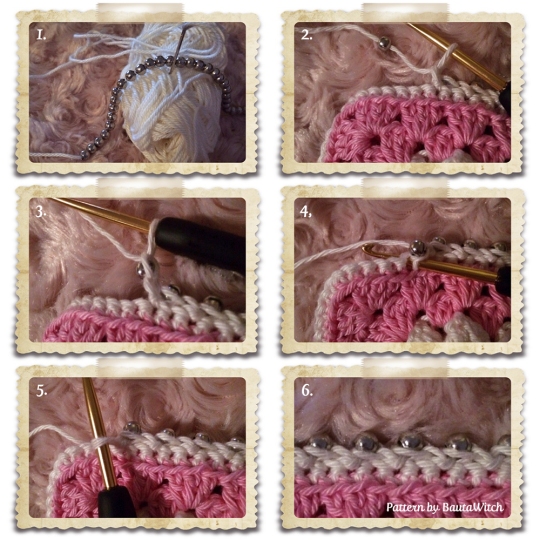
Uddkant = Lacy edging:
Use your second ball of the base color for the lacy edging. You now use crochet hook 2,5 mm (to give the beanie a nice shape):
Ch 1 in one of the stitches in front of one of the dc’s you made on the back of your work (as in the photo) *1 sc in the next dc’s you made on the front of your work, ch 2 and 1 sc in your last sc*. Repeat between the *s and finish with 1 sl st where it appears the least. Fasten off.
THE BEANIE
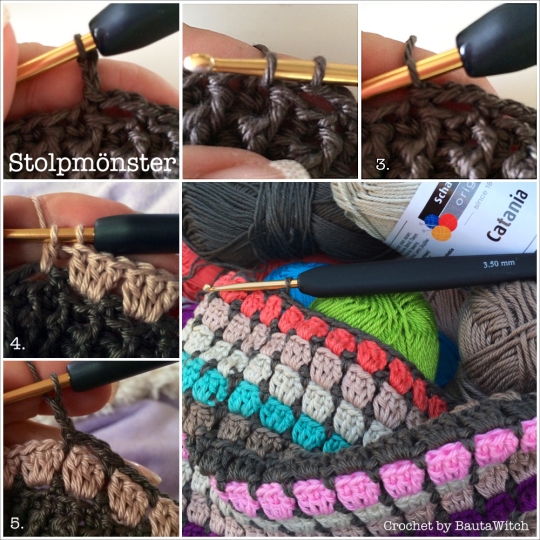
Change to crochet hook 3,5 mm. Continue with your base color. Round 6: 1 sc, *ch 2, skip 2 sts, 1 sc*. Repeat between *s. If you started with chaining 120 you now should have to now have 40 chain spaces. Time to change color (but do not cut the base color, let it run on the inside of the beanie by picking it up on every other round). Round 7: 1 sl st and ch 2 = 1st dc and 2 more dc in the first ch sp. Continue with 3 dc in each ch sp. Finish round with 1 sl st in 1st dc on round. Fasten off.
Round 8: Pick up your base color again and crochet 1 sc between the clusters, *ch 2, skip 3 dcs (= 1 cluster), 1 sc*. Repeat between the *s and finish the round with 1 sl st. Change color but do not cut the yarn. Repeat round 7-8 until you have got 24 rounds with clusters.
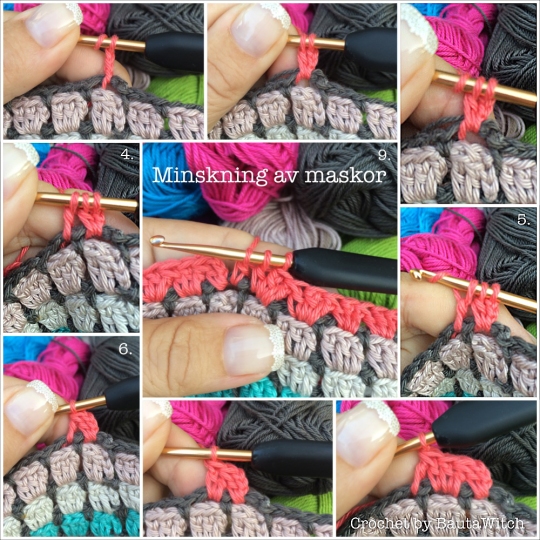
Minsking = Decreasing:
Continue with your base color and crochet a round of clusters while decreasing. This is shown in detail on the photo above with the beautiful color Dark Coal (252). (On my beanie this round is in reality made with the base color Dark Olive.)
A decrease is made by crocheting 2 dcs together. The last dc of a ch sp with the first dc in the next ch sp!
Start with 1 dc in the closest ch sp. *Make a decrease as explained above, 1 dc*. Repeat between the *s and finish round with 1 sl st in the 1st dc.
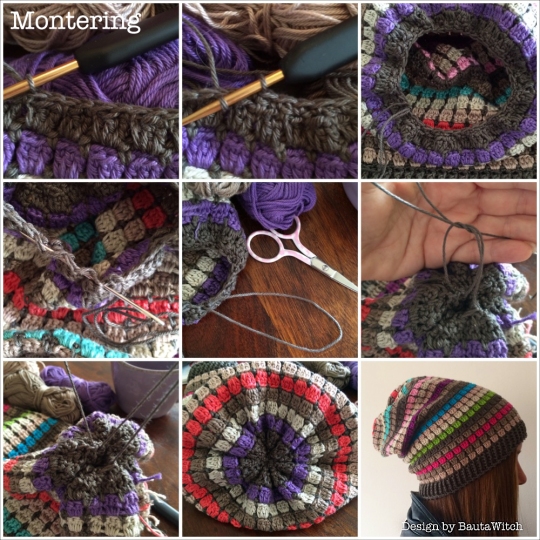
The slouchy end:
– 1 sc, *skip the cluster, 1 sc*. Repeat between the *s and finish round with a sl st. Fasten off but leave a long tail.
– Sew ”downhill” along the opening in the stitches that are left. Pull it tight.
– Save a loop and a long tail. Sew with the tail to the opposite side. Tie several times.
– Attach your yarn ends.
Good Luck!
Please remember that English is my second language and that it is not easy for a Swede to always get the difference in UK and US English crochet terms, so if my translation sucks or needs improvements,
please let me know! 😉
And please, do not forget to link to my blog if you share your beanie with the world anywhere on the net!

 When I finished